None found
Your search returned no hits.
95% of all problems already have a solution in our knowledgebase

Added: 23.09.2015 10:01:56 Last updated: 24.09.2015 10:02:01
This guide explains how to set up an FTP account in the CyberDuck FTP client. We assume that you have already installed CyberDuck on your Mac, and that you have not yet set up any accounts. CyberDuck is a free FTP client that can be downloaded here, if you have not installed it already.
NOTE: Here, we will show you how to set up CyberDuck on the Mac, but the application can also be used on a Windows PC. Icons may look different, but the procedure will be exactly the same, so this guide can also be used for the setup on a PC.
Step 1:
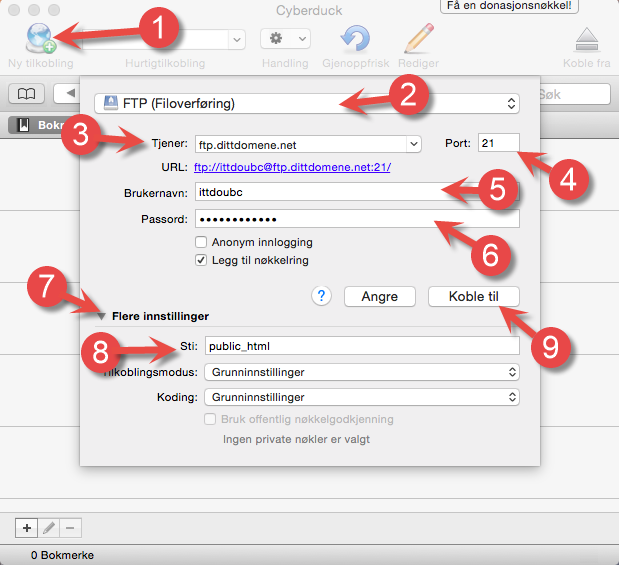
Step 2:
The below window will now be displayed. This will appear because the server supports SSL, but it is not activated as a default in the application. To continue without SSL, choose "Continue"; to use SSL, choose "Change".
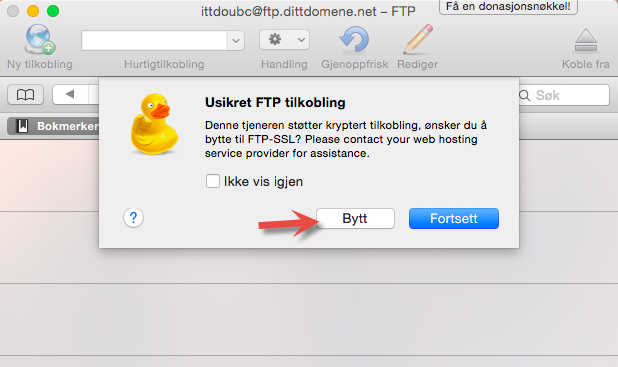
Step 3:
A window warning of the certificate will appear. Click "Continue".
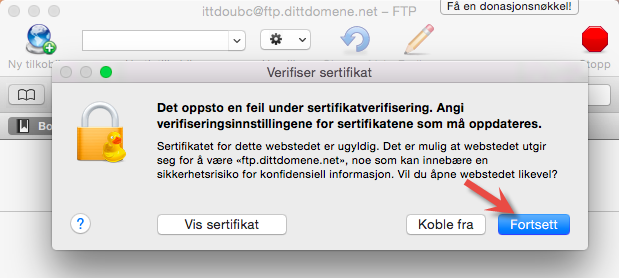
Step 4:
You are now connected, and you will see the contents of the "public_html" folder on the server.
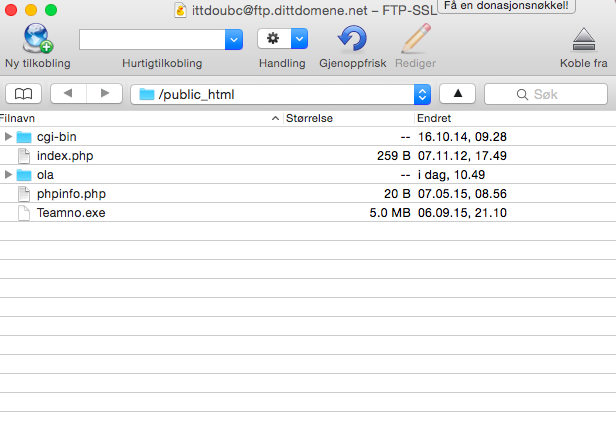
Done
We have now covered the steps required for setting up an FTP account in CyberDuck for Mac.