None found
Your search returned no hits.
95% of all problems already have a solution in our knowledgebase

Added: 09.04.2019 11:10:05 Last updated: 16.12.2021 14:06:52
This guide explains how to restore files, folders and databases on your web hosting through the Acronis Backup. The guide requires you to first log into cPanel.
Please note that:
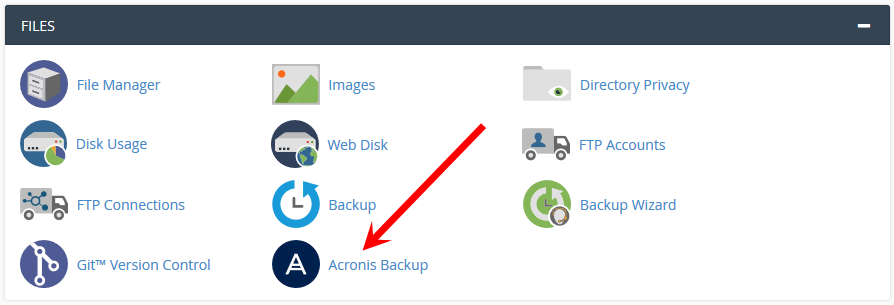
Step 1:
Click the icon for "Acronis Backup" as shown below:
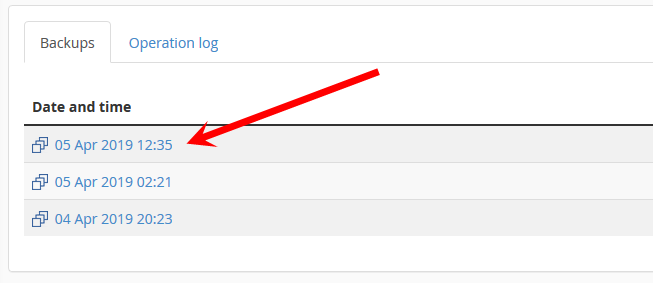
Step 2:
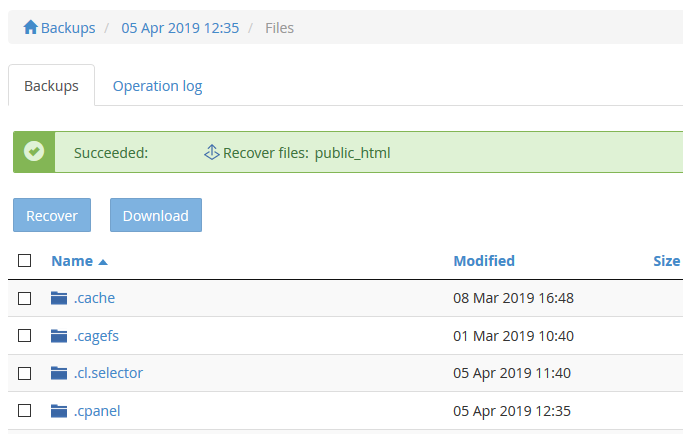
In this example we want to restore the content in the "public_html" folder from April 5th. Click on the date to show the possible items we can recover.
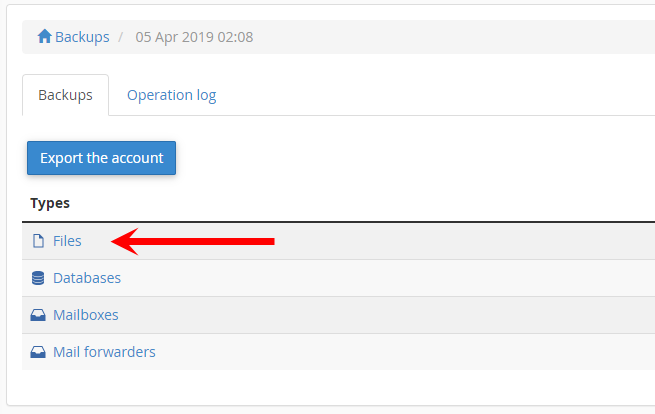
Step 3:
Click "Files" as shown below.
Step 4:
You can also recover specific files and folders by navogating around the filesystem from here. In this example we want to recover the entire "public_html" folder, so we check the checkbox next to it (you might have to scroll down to find it).
1. Click "Recover" to recover the folder.
2. You can also download the entire "public_html" folder if you want. This will use disk-space from the web hosting and will appear in the "recovered_files" folder in the root of the hosting.

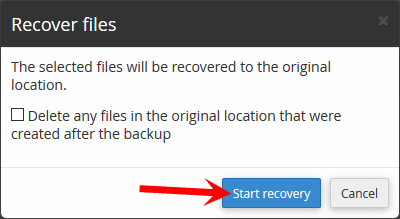
Step 5:
Click "Start Recovery" to overwrite the files on your web hosting under the "public_html" folder. In some cases, if for example your account has been conpromised, you might want to delete all the content of the "public_html" folder before recovering.
Step 6:
The recovery is now complete. The entire "public_html" folder is overwritten with the one from the backup.
Finished
We have now been through how to recover files from a backup from a specific date. It is usually not needed to recover the entire web hosting, only specific folders. If you need to recover emails, you can follow this guide.
Step 1
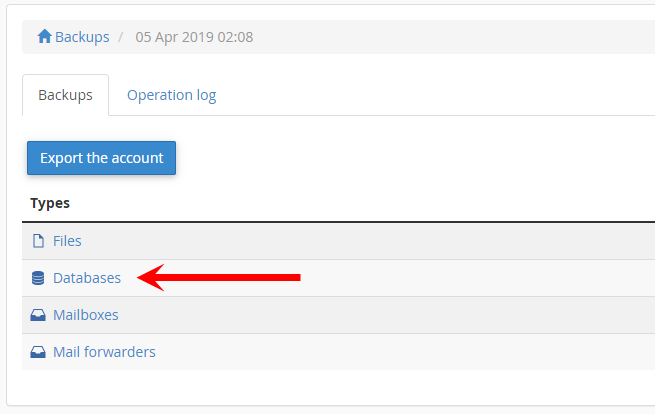
Instead of choosing "Files" in step 3 above, choose "Databases" as shown below.
Step 2
Check the checkbox next to the database you want to recover, then click "Recover".

Step 3
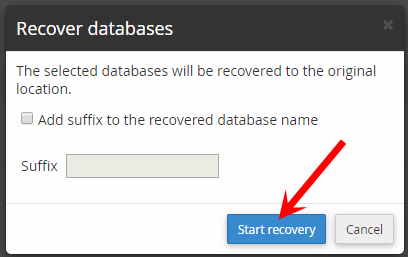
Click "Start Recovery" to recover the database. This will replace the database currently on the web hosting. If you want to recover the database with a different name, check the "Add suffix to the recovered database name" checkbox and add text in the textbox before clicking "Start Recovery". Note: you will need to have room for another database on your webhosting for recovery with a different name to be possible.
Step 4
The database recovery is now finished.

Finished
We have now been through how to recover a database from backup from a specific date.