None found
Your search returned no hits.
95% of all problems already have a solution in our knowledgebase

Added: 10.03.2014 23:26:29 Last updated: 11.05.2019 14:41:48
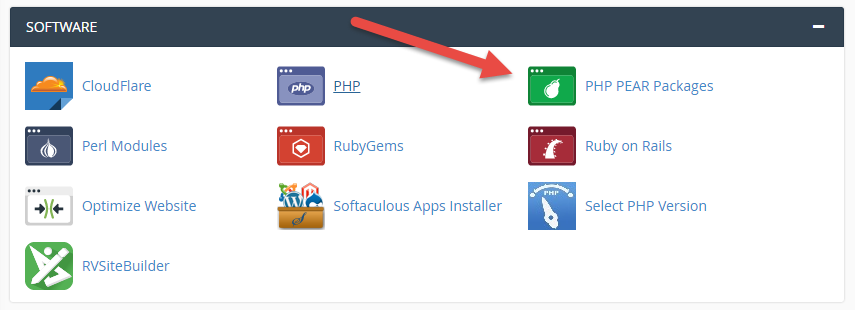
This guide details how to install PEAR packages in cPanel. The guide requires you to first log into cPanel.
Step 1:
Click on the icon for "PHP PEAR packages" as shown in the screenshot below:
Step 2:
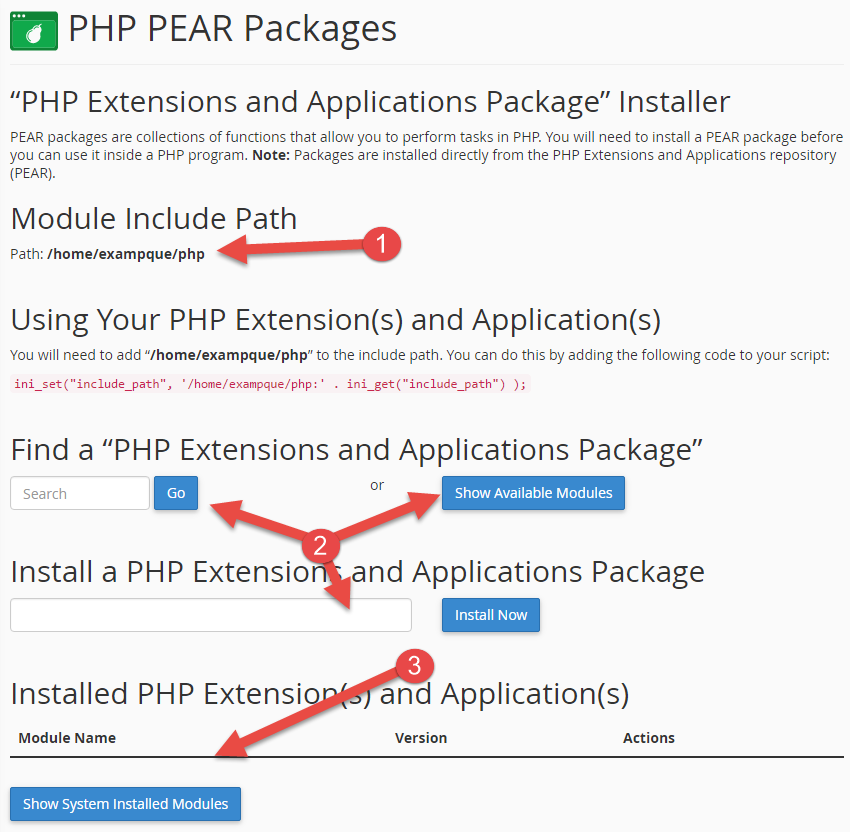
Step 3:
We have chosen alternative 2.2 in step 2 and clicked on "Show available modules". In the overview that shows up on the next page we choose to install the package "Benchmark (1.2.9)" and click on "Install" as shown in the screenshot below.

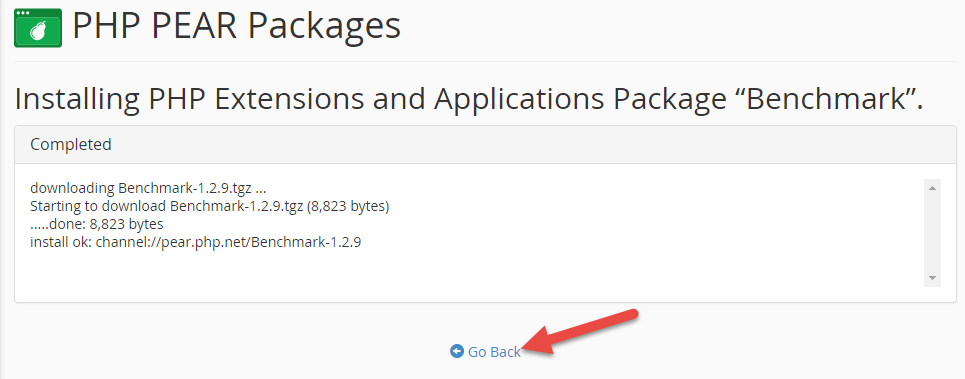
Step 4:
The log of how the installation went will be shown on the next page. Click on "Go back".
Step 5:
The package "Benchmark" is now shown in the overview of installed packages from step 2. Via the overview you can:

Done
We have now been through how to install a PEAR package in cPanel.