None found
Your search returned no hits.
95% of all problems already have a solution in our knowledgebase

Added: 23.11.2021 15:11:12 Last updated: 25.11.2021 10:43:11
In this guide we'll learn how to activate debugging in WordPress
Why activate debugging?
Debugging makes it easier to find and solve issues with your website by displaying a more detailed explanation of the issues directly on your website when they occour.
Debugging can be activated through the File Manager or the Terminal.
Step 1:
Log in to cPanel and click "File Manager" as shown on the picture below:

Step 2:
Double click the"public_html" folder:

Step 3:
Right click "wp-config.php" and choose "Edit":

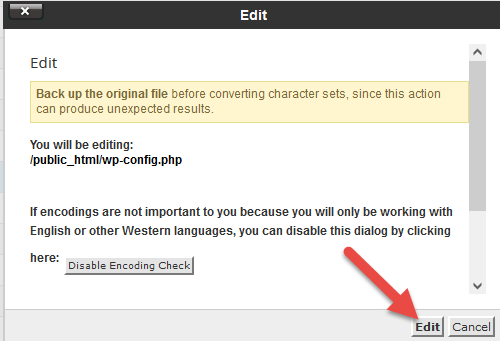
Step 4:
Click "Edit" when prompted:
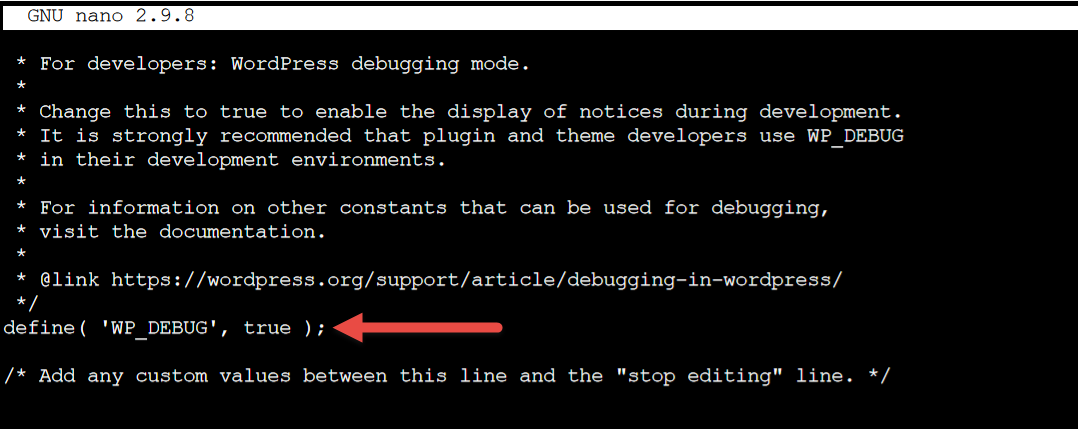
Step 5:
Scroll down until you see "define( 'WP_DEBUG', false );"

Step 6:
Change "false" to "true" so that it looks identical to the picture below:

Step 7:
Click "Save Changes" in the top right corner:

Done
You have now activated debugging in wordpress.
To deactivate debugging, change "true" to "false" as shown in the picture in Step 5.
Step 1:
Click the "Terminal":

Step 2:
In the terminal, write "cd public_html" and press enter:

Step 3:
Write "nano wp-config.php" and press enter:

Step 4:
Use the arrow keys to scroll down until you see "define( 'WP_DEBUG', false );":

Step 5:
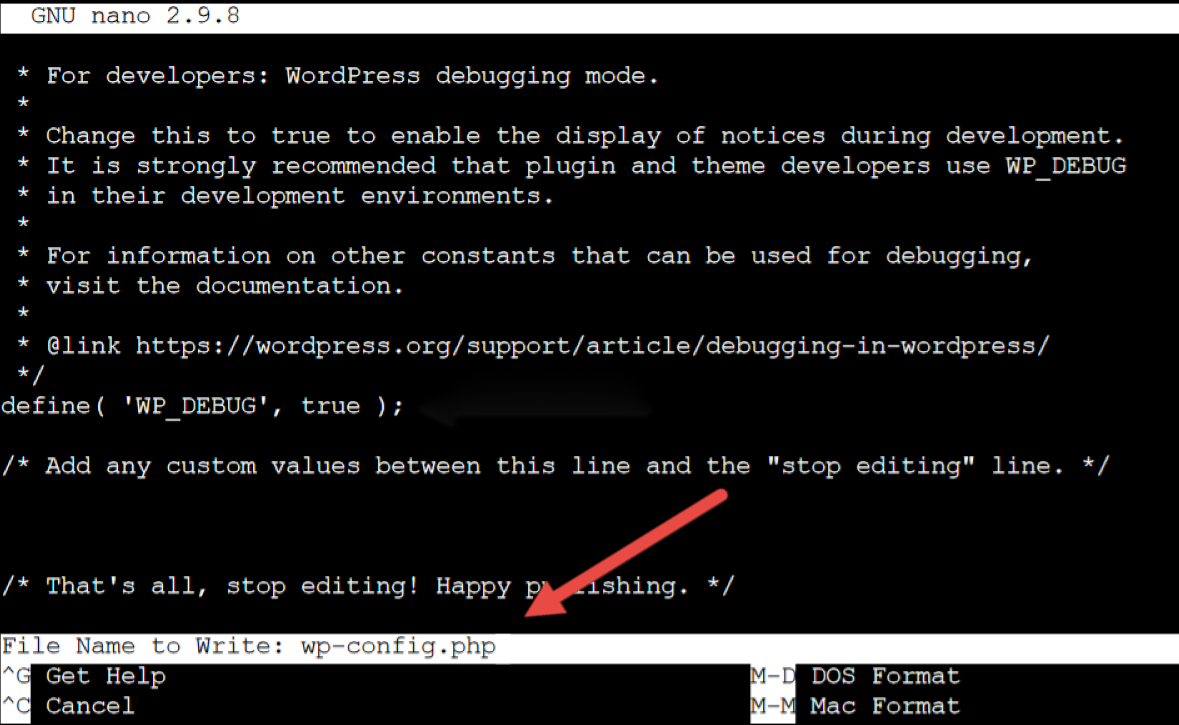
Change "false" to "true" as shown in the picture below:
Step 6:
Hold the ctrl button and press the letter "O" on your keyboard. When the white line with "File Name to Write: wp-config.php" appears, press enter:
Done
You have now activated debugging in wordpress.
To deactivate debugging, change "true" to "false" as shown in the picture in Step 4.